Let's build a VORON Trident
Let's build a VORON: Toolhead
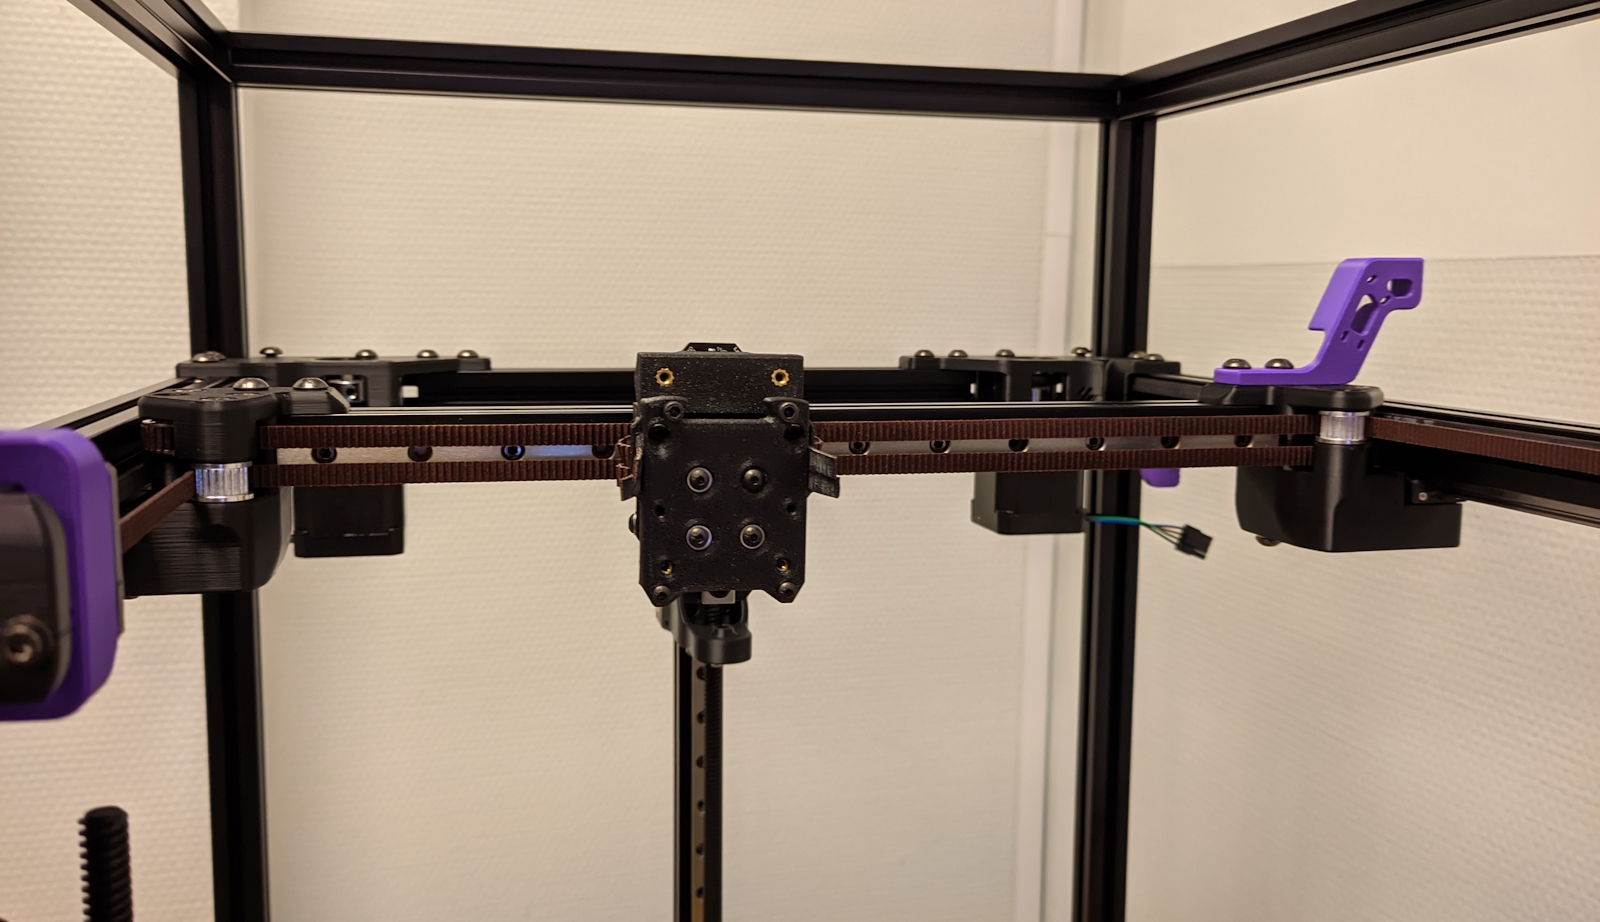
Since the last update I’ve made some good progress:
- All the motors are installed
- The x-axis and belt are installed
- Tap is installed
- The toolhead with Stealthburner + Clockwork 2 is also installed

I’ve run into a few problems on the way that I’ll try to document, but other than that the build has been really fun so far. The design of Clockwork, Stealthburner and Core XY is really cool and it’s been very interesting to assemble them to see how it all comes together.
X-axis and belts
I didn’t encounter any issue assembling the x-axis or the belts.
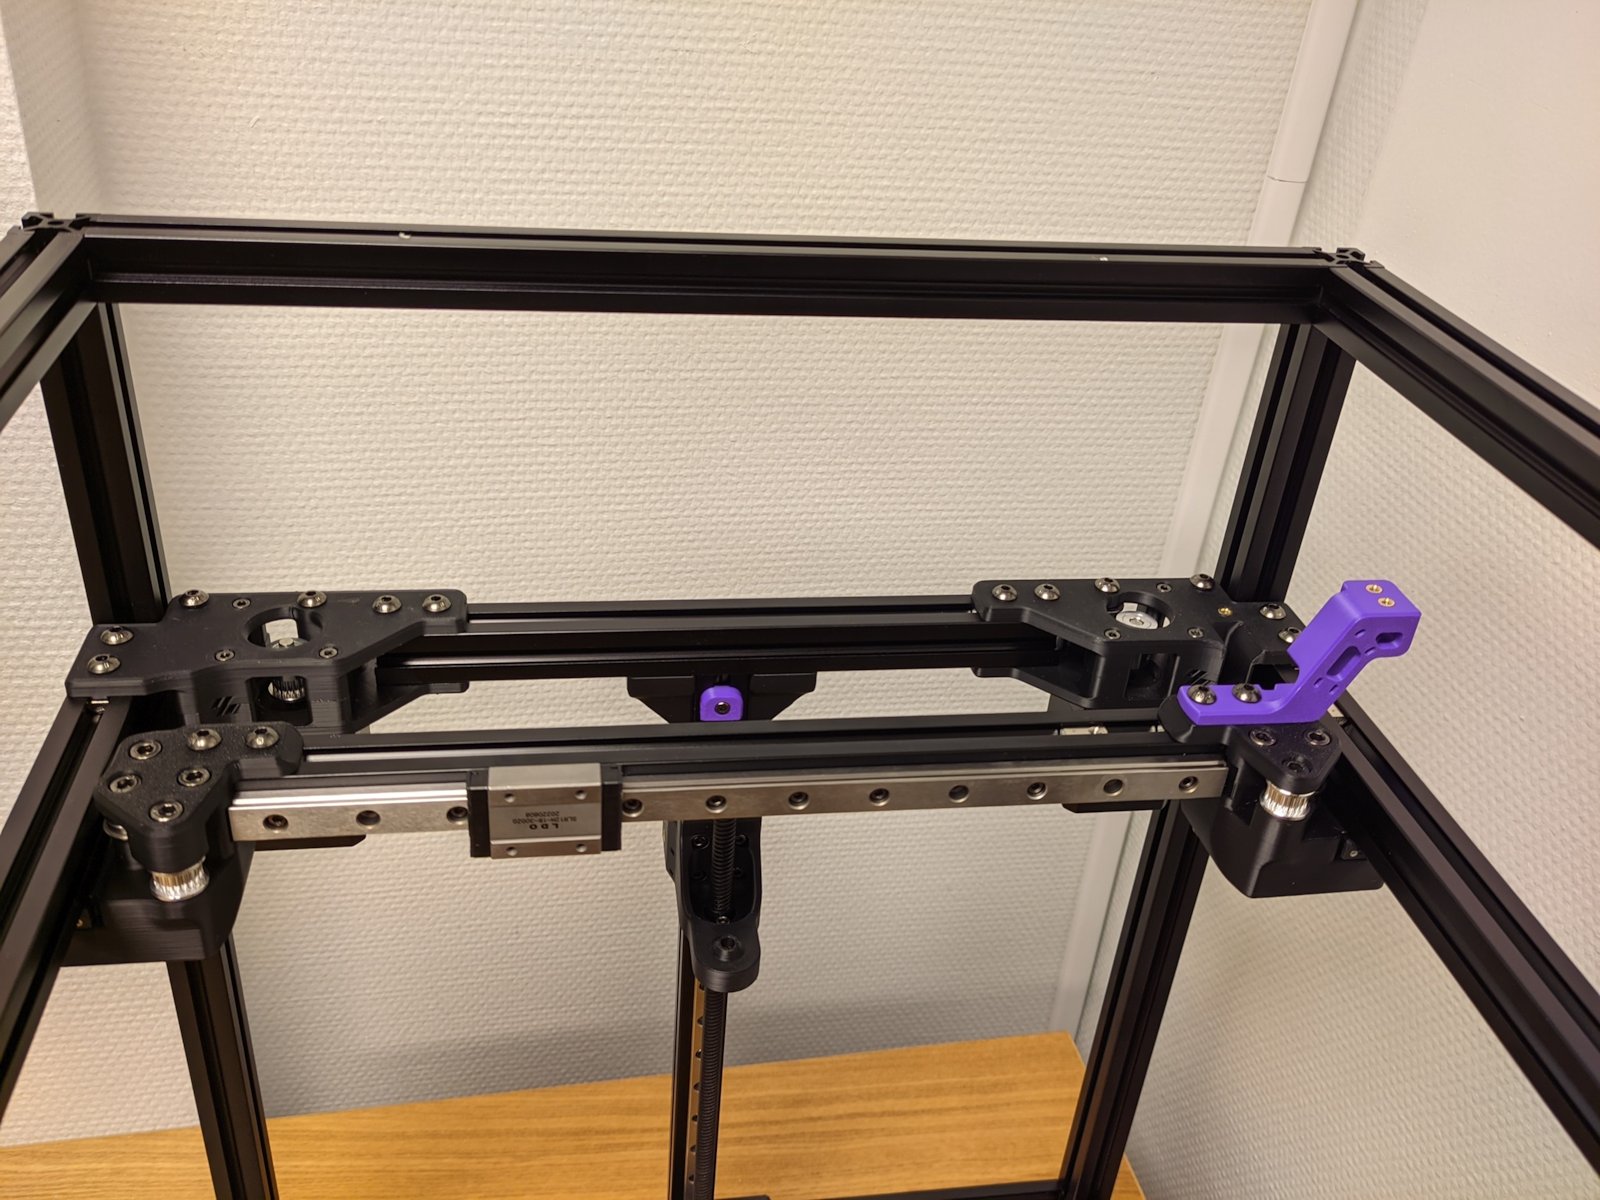


I’m slightly worried that I messed something up as moving the gantry from front to back has a very slight hiccup in the middle, but it doesn’t come up when I move it from back to front or if I move it slowly.
Toolhead
Up to here it’s been fairly straightforward. Just follow the official assembly guide and don’t forget to read the LDO Build Notes/FAQ.
But assembling the toolhead (or printhead, what’s the difference?) was not so simple and I had to reference several sources:
- VORON Tap manual and VORON Tap errata
- VORON Stealthburner manual
- LDO Voron Stealthburner + Clockwork 2 + LDO Toolhead PCB Revised
- LDO Voron Trident 250 Wiring Guide (Rev. A/C)
- LDO Input Shaper Toolkit
- VORON 2.4 R2 MPX CBT build series part 16 - Rapido HF hot end unbox and installation
This was confusing and I managed to trip up on several things.
Tap
My plan wasn’t actually to build Tap from the start, and instead rely on the standard inductive probe. Even though the kit stated the probe was included, it wasn’t listed in the parts checklist so I assume it wasn’t included in the kit?
No big deal. Instead of building the Klicky probe just to tear it down and replace with Tap later, I decided to build Tap from the get-go.
The first thing that confused me was the printed parts. In the Tap manual the main printed part had the VORON logo, yet my part did not. There were some other minor differences, so maybe I got the printed parts from an older revision of Tap?
But the manual also didn’t seem updated to the latest version as it was missing items from the errata (which I only discovered after assembling Tap). There were no mentions of the tall reinforcement screws (that I could install afterwards), belt covers (that I didn’t use) or how to install the 2 extra magnets (that now lie unused).

Still, I got it assembled and it seems to work? Crosses fingers.
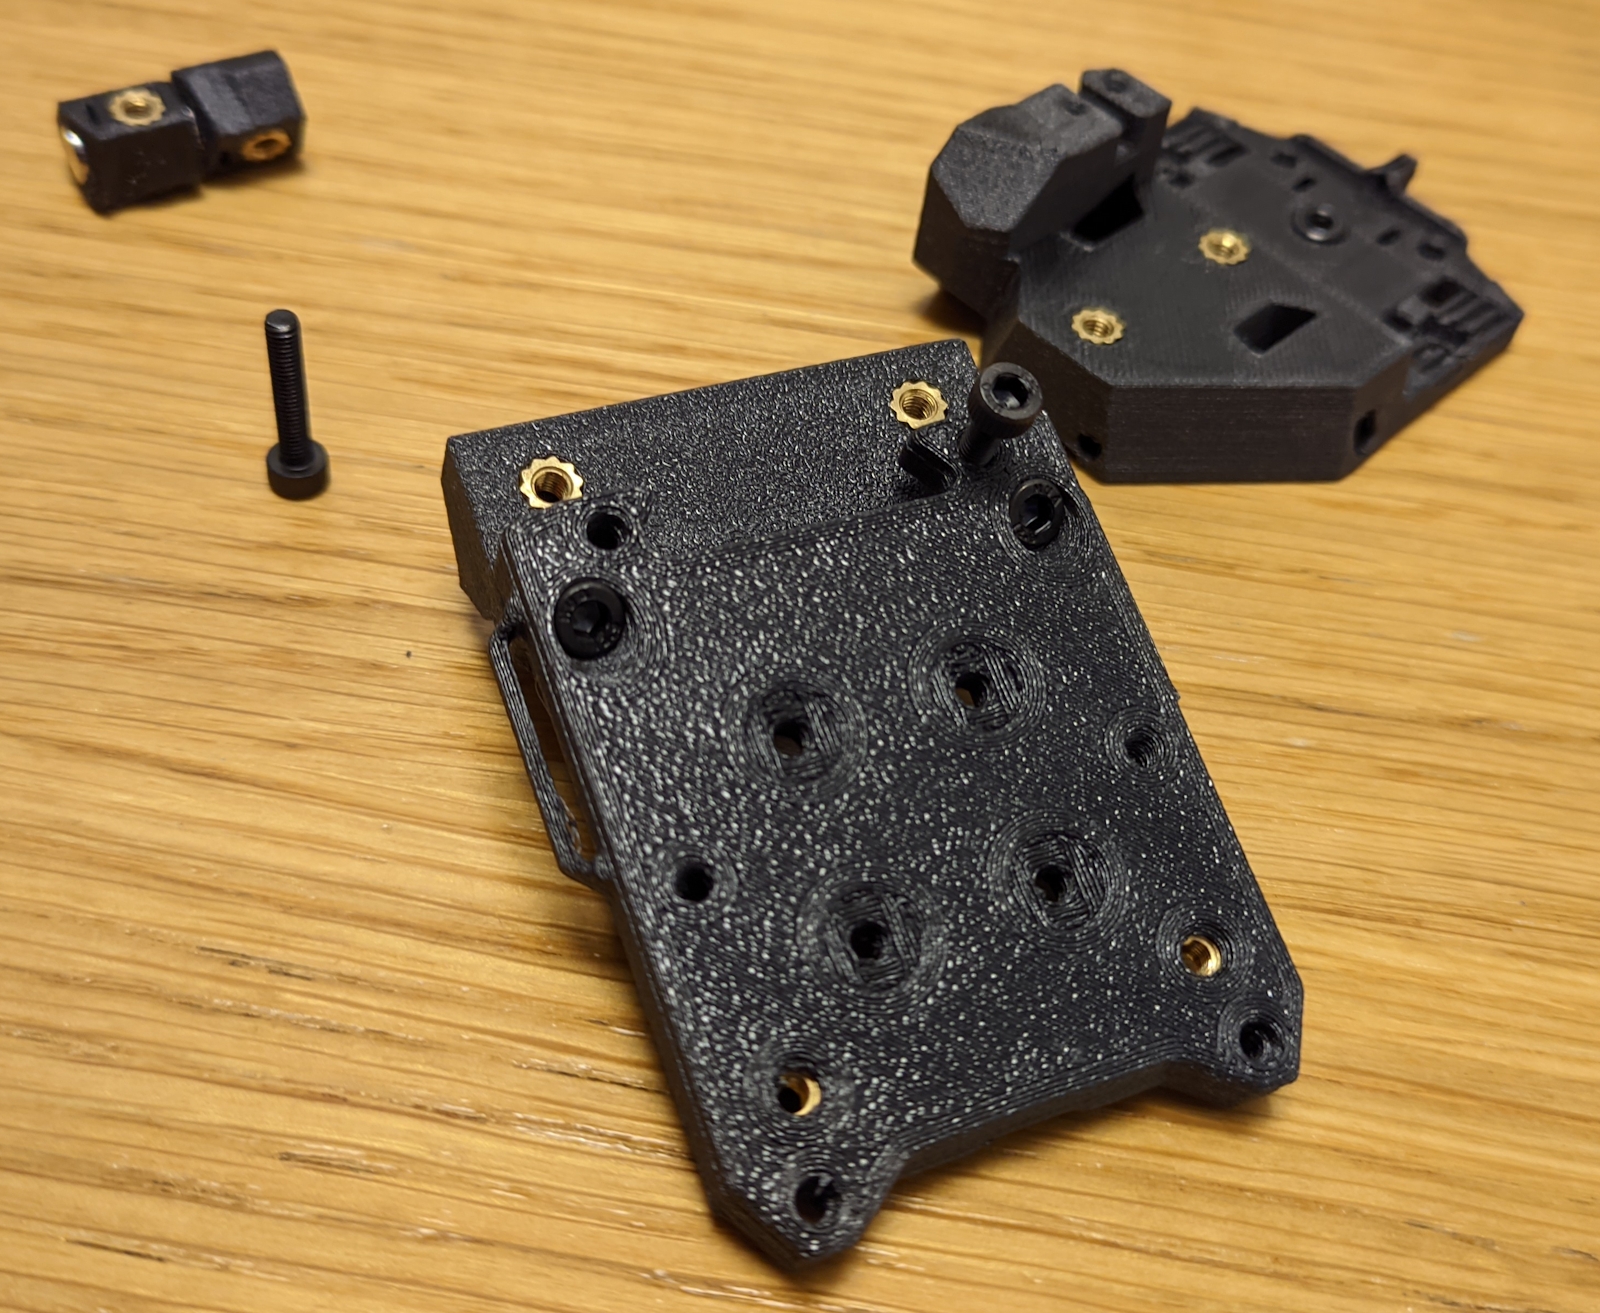
Clockwork, mod or no mod?
For the top part of the Stealthburner, I did the component prep and then I noticed that the LDO documentation refers to a revision that called for using alternative printed parts.
Okay, okay. I redid installed heatset inserts on those parts as well and went to work. It went well until I had to install the PCB and the printed mount (from the revision) didn’t fit.
Alright, improvisation time:
Of course later on I found a plastic part that was made for the job and replaced the mount:

… And then I found out why it didn’t fit. There was this line in the revision:
THIS MOD NO LONGER REQUIRED for V2.4 Rev. C - the kit includes the Stealthburner PCBs and works with the stock parts.
I’m not building a V2.4, so I didn’t think it applied to me. But now I think it was a bad assumption. I’m building the Rev.C of the Trident, which seems to have the new version of the PCB that fits the standard parts.
At first I was going to leave it like this cause why bother, but then I read a note hidden in the wiring guide that for the new PCB I needed to use a specific cable cover that of course wasn’t compatible with the modified parts…
So I redid everything.
And then I discovered that the specific cable cover I had was missing the thermistor holder:
Darn it.
But I think (hope) it should finally be finished enough; I can probably tuck the thermistor somewhere to get it to print.
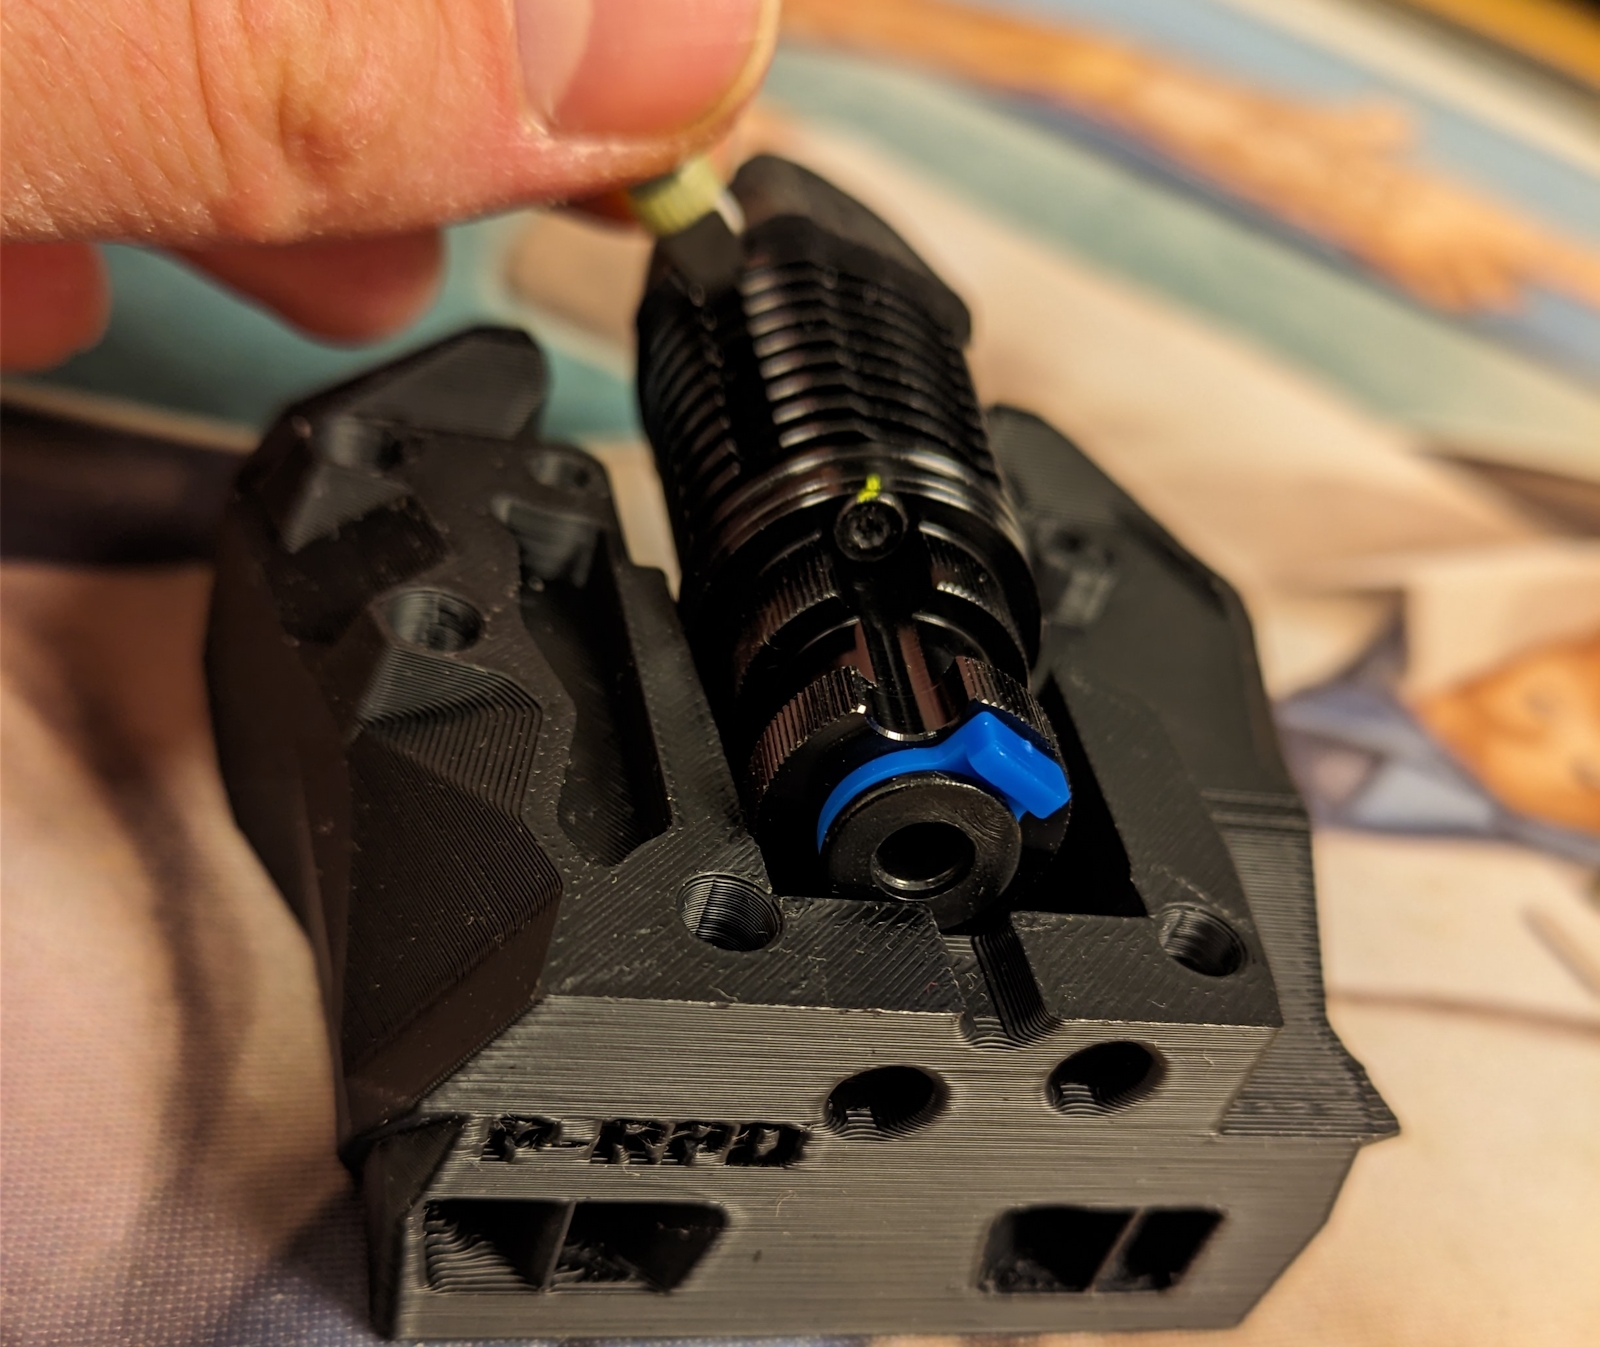
Installing a hotend
When I was going to install the Rapido UHF hotend that I got I had a small panic.
I couldn’t find any VORON documentation on how to install it (the assembly manual only shows another hotend). From Rapido I got a very nice looking card pointing to https://www.phaetus.com/rapido-hotend that led nowhere.
And when I tried searching for it online I found that Rapido UHF actually wasn’t supported!
Oh no!
I was sure I read that the UHF version also contained HF parts, but maybe that was wrong? Do I need to buy new printed parts from someone? Or maybe a new hotend? Buy the Rapido HF instead of the UHF I got?
I’m off watching reviews on the newly released Rapido 2.0…
Luckily I found a YouTube video showing how to install it:
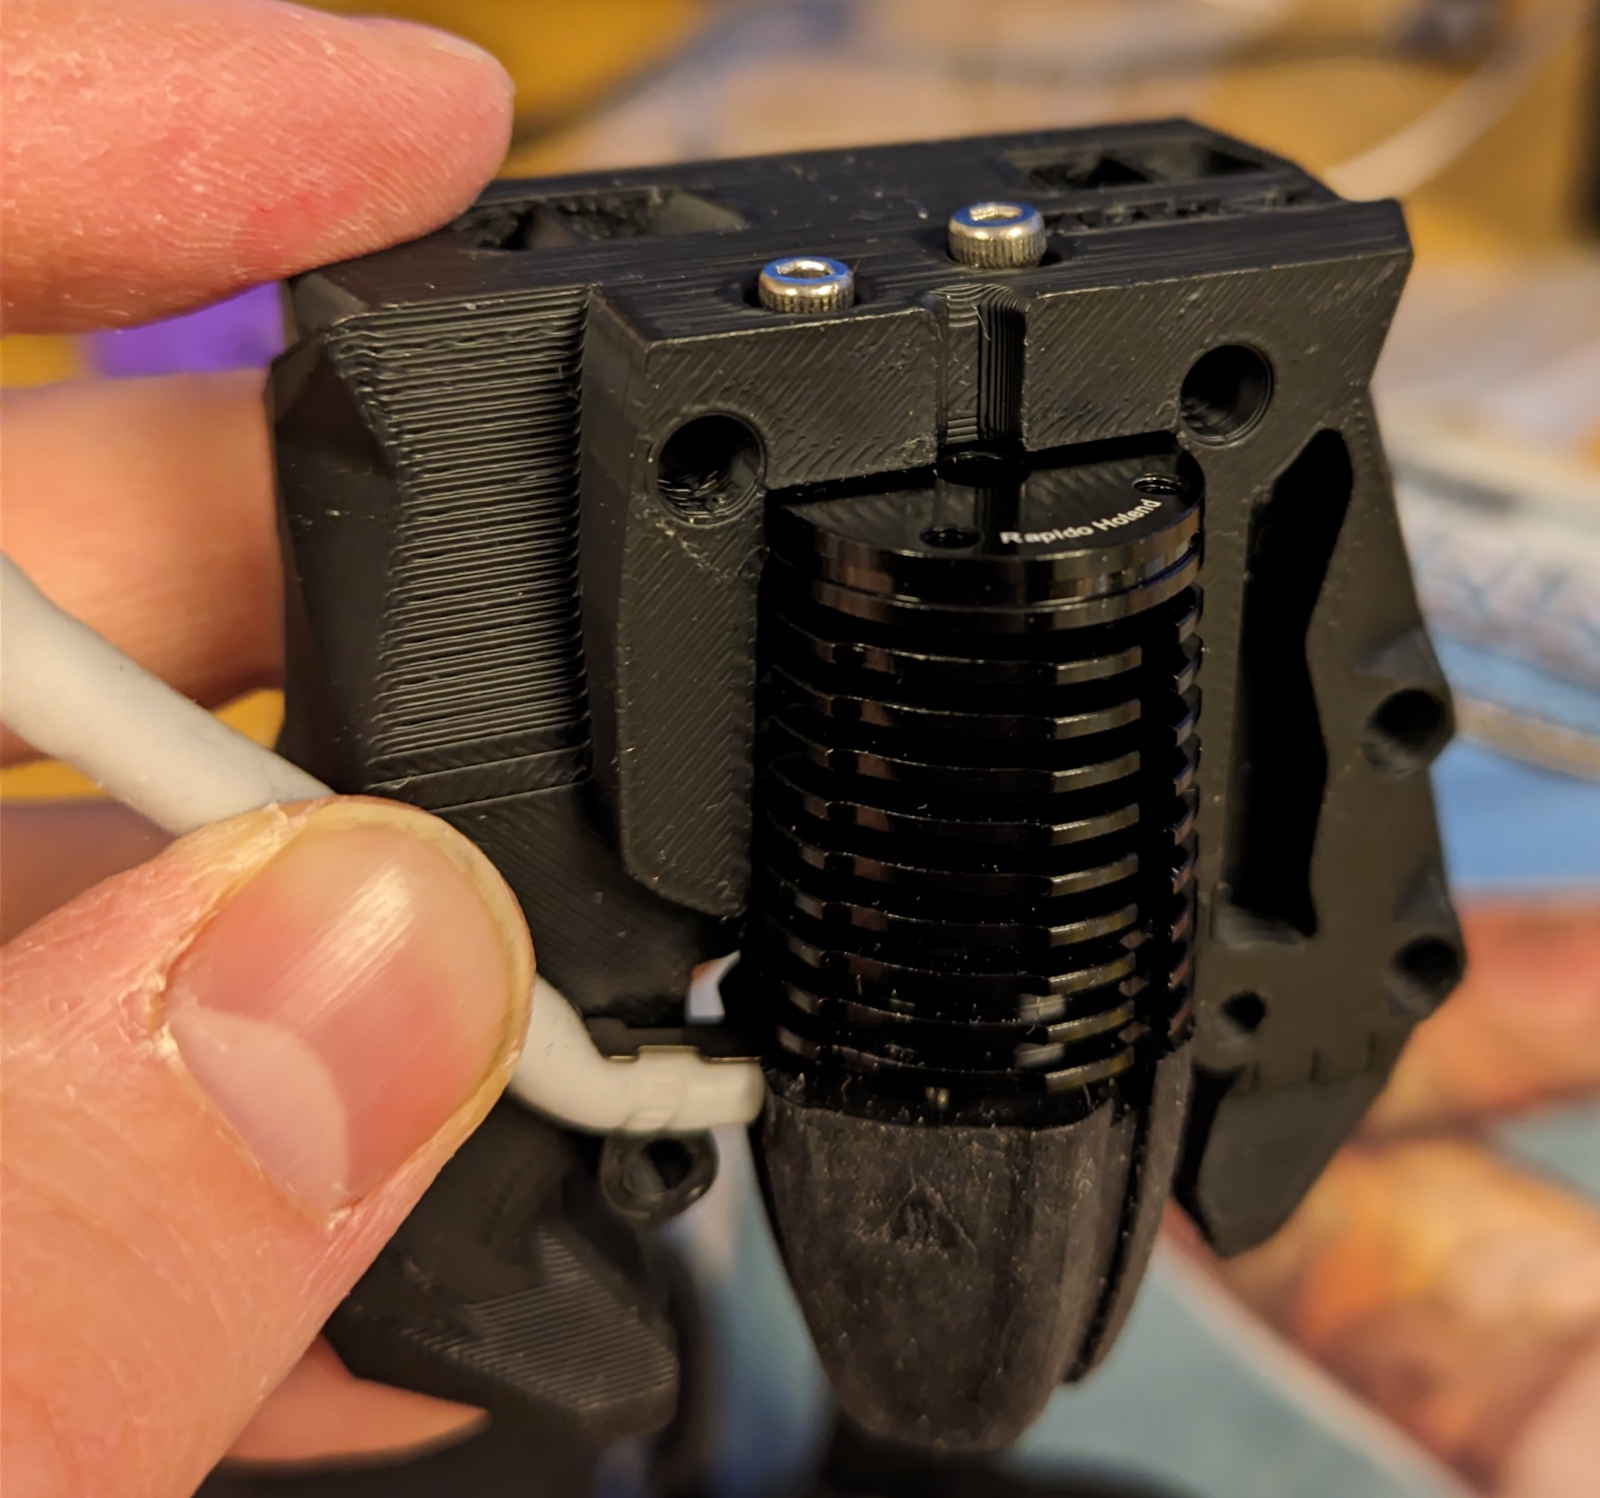
Crisis averted; all is well.
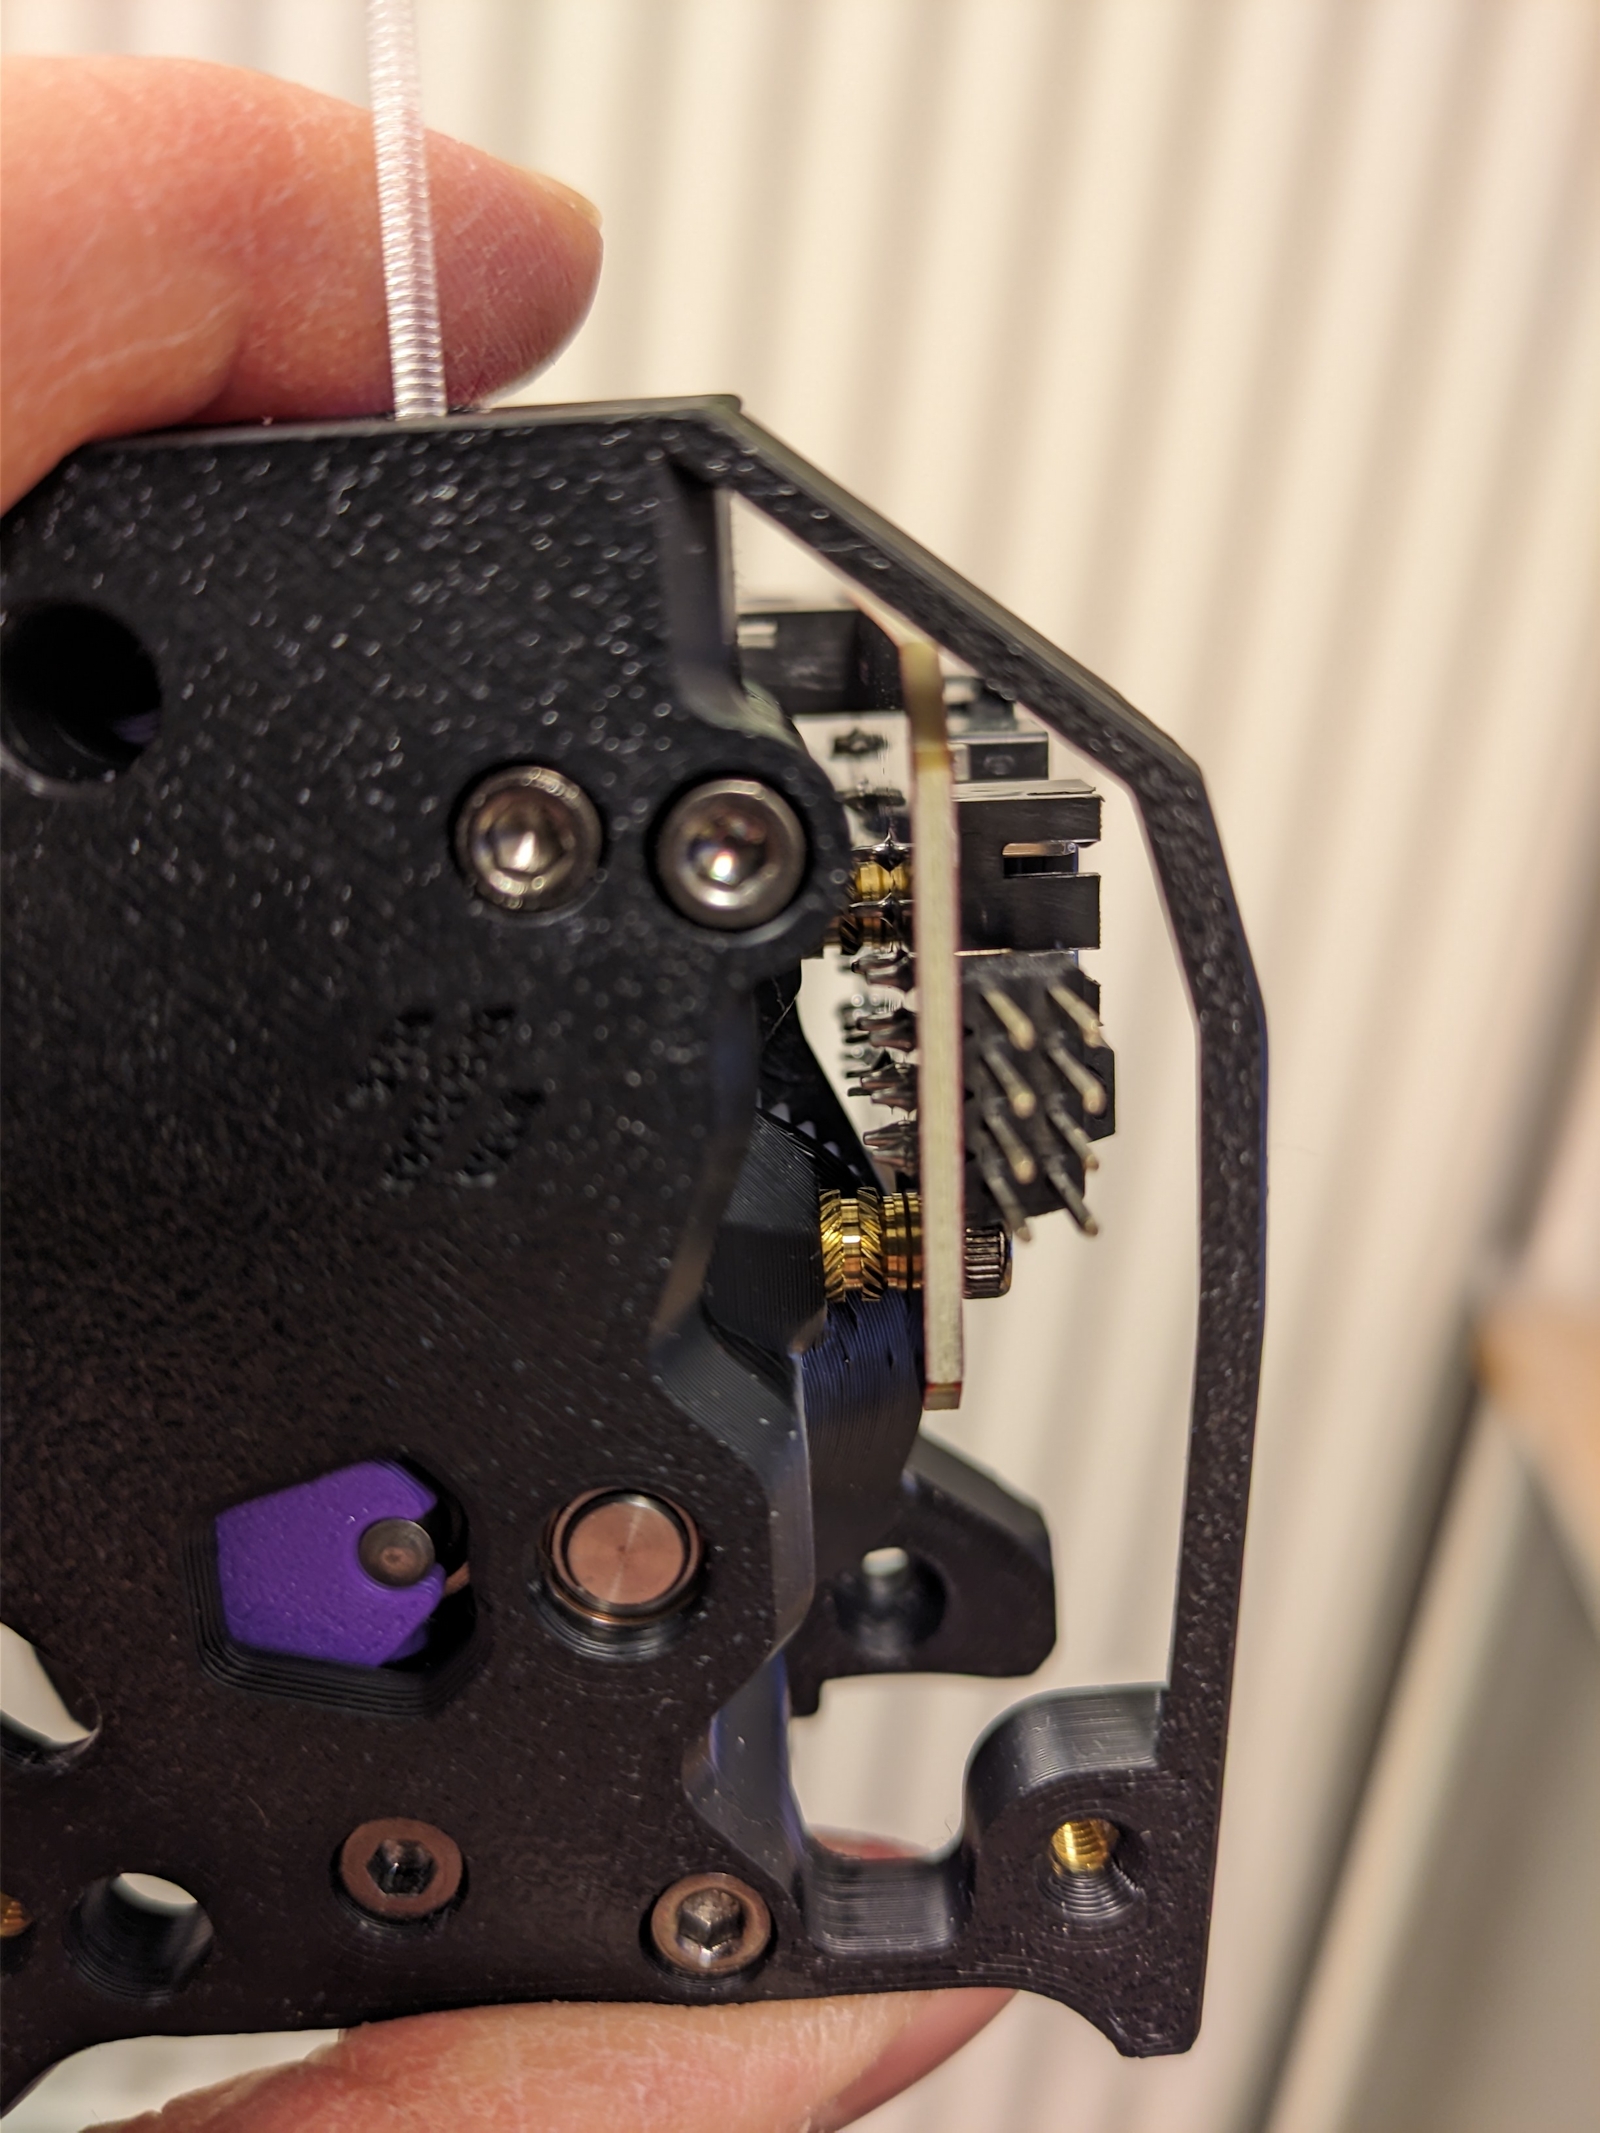
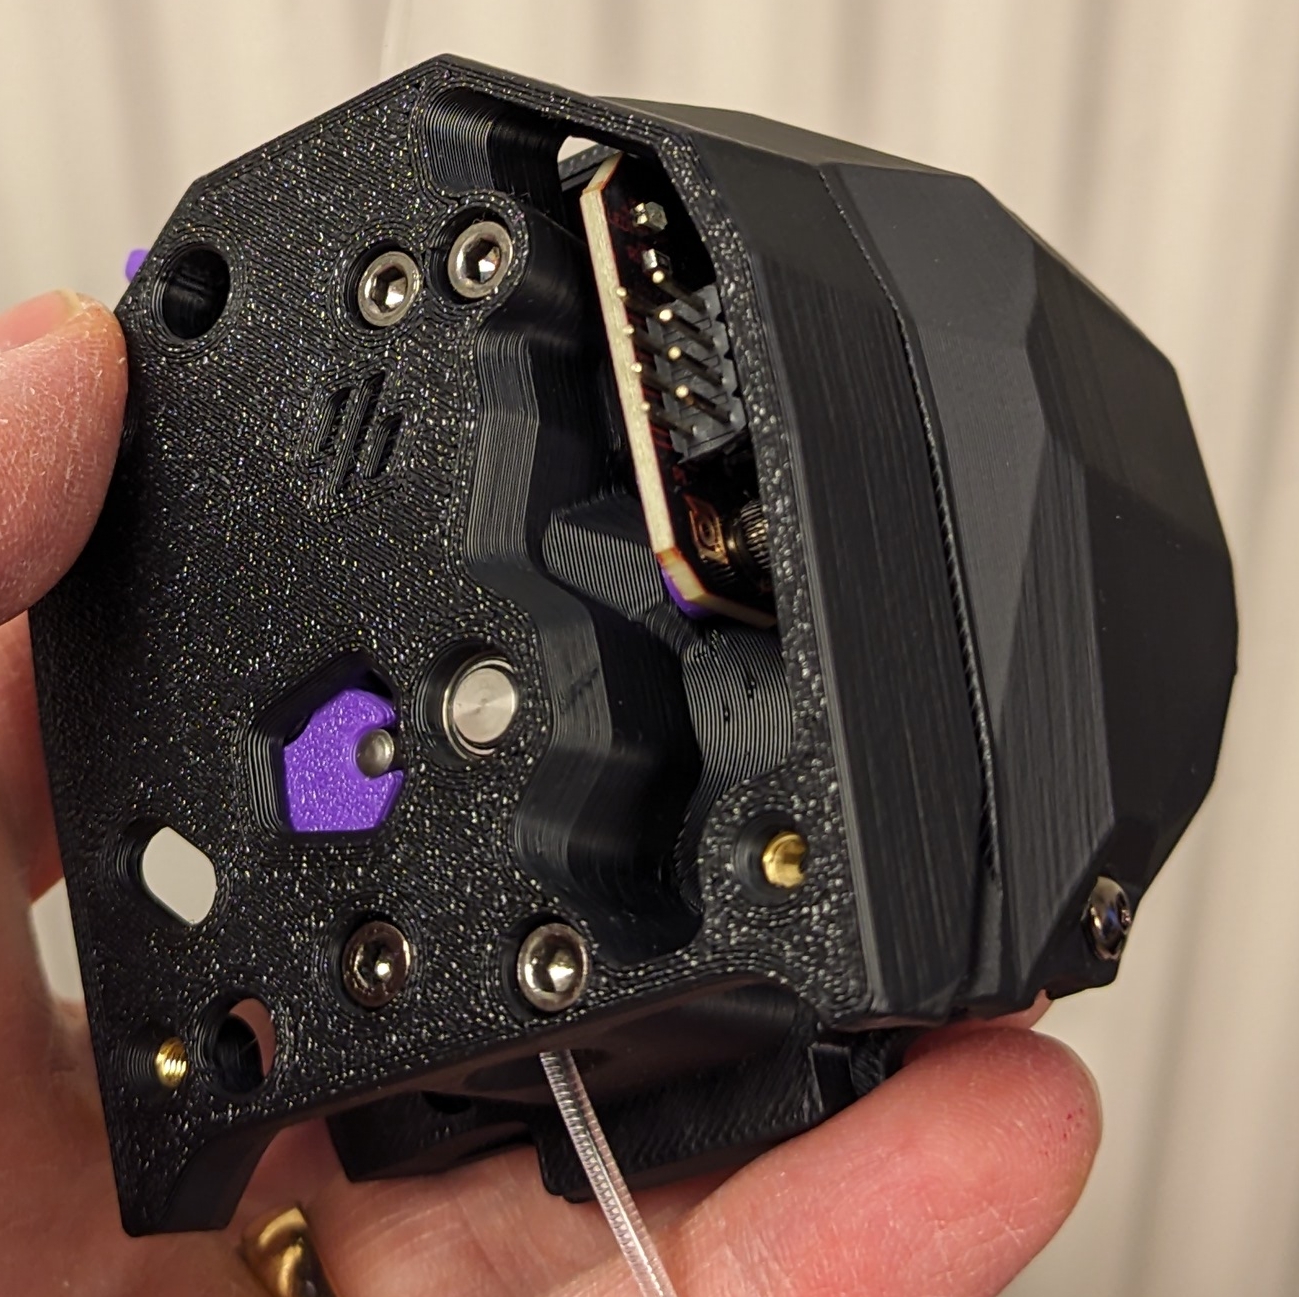
Stealthburner assembly
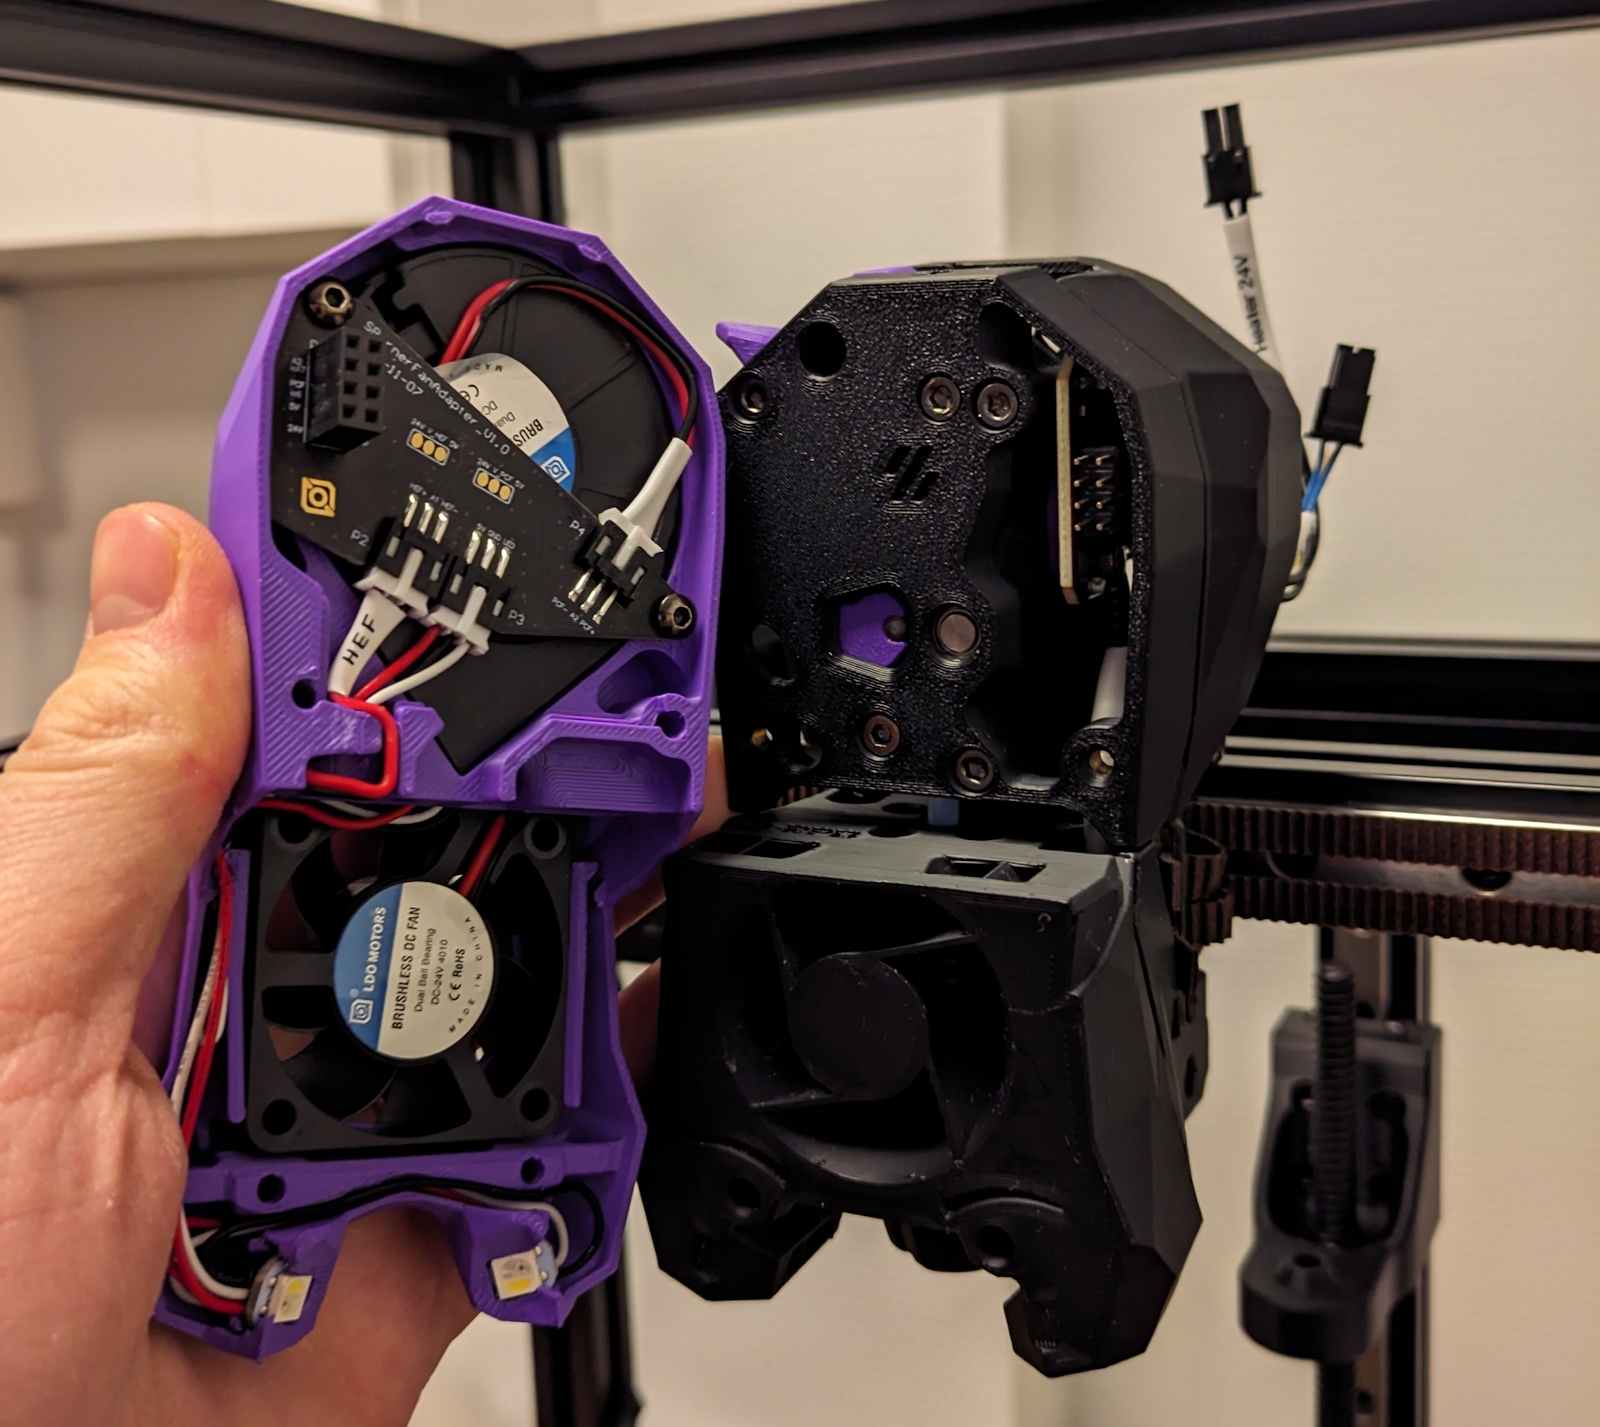
It was slightly scary that you had to break off and cut into a fan—I really didn’t want to mess it up permanently. But after watching NERO 3D do that I managed to collect the courage to do it as well.
When I was going to plug in the hotend I noticed it didn’t connect to the PCB properly:
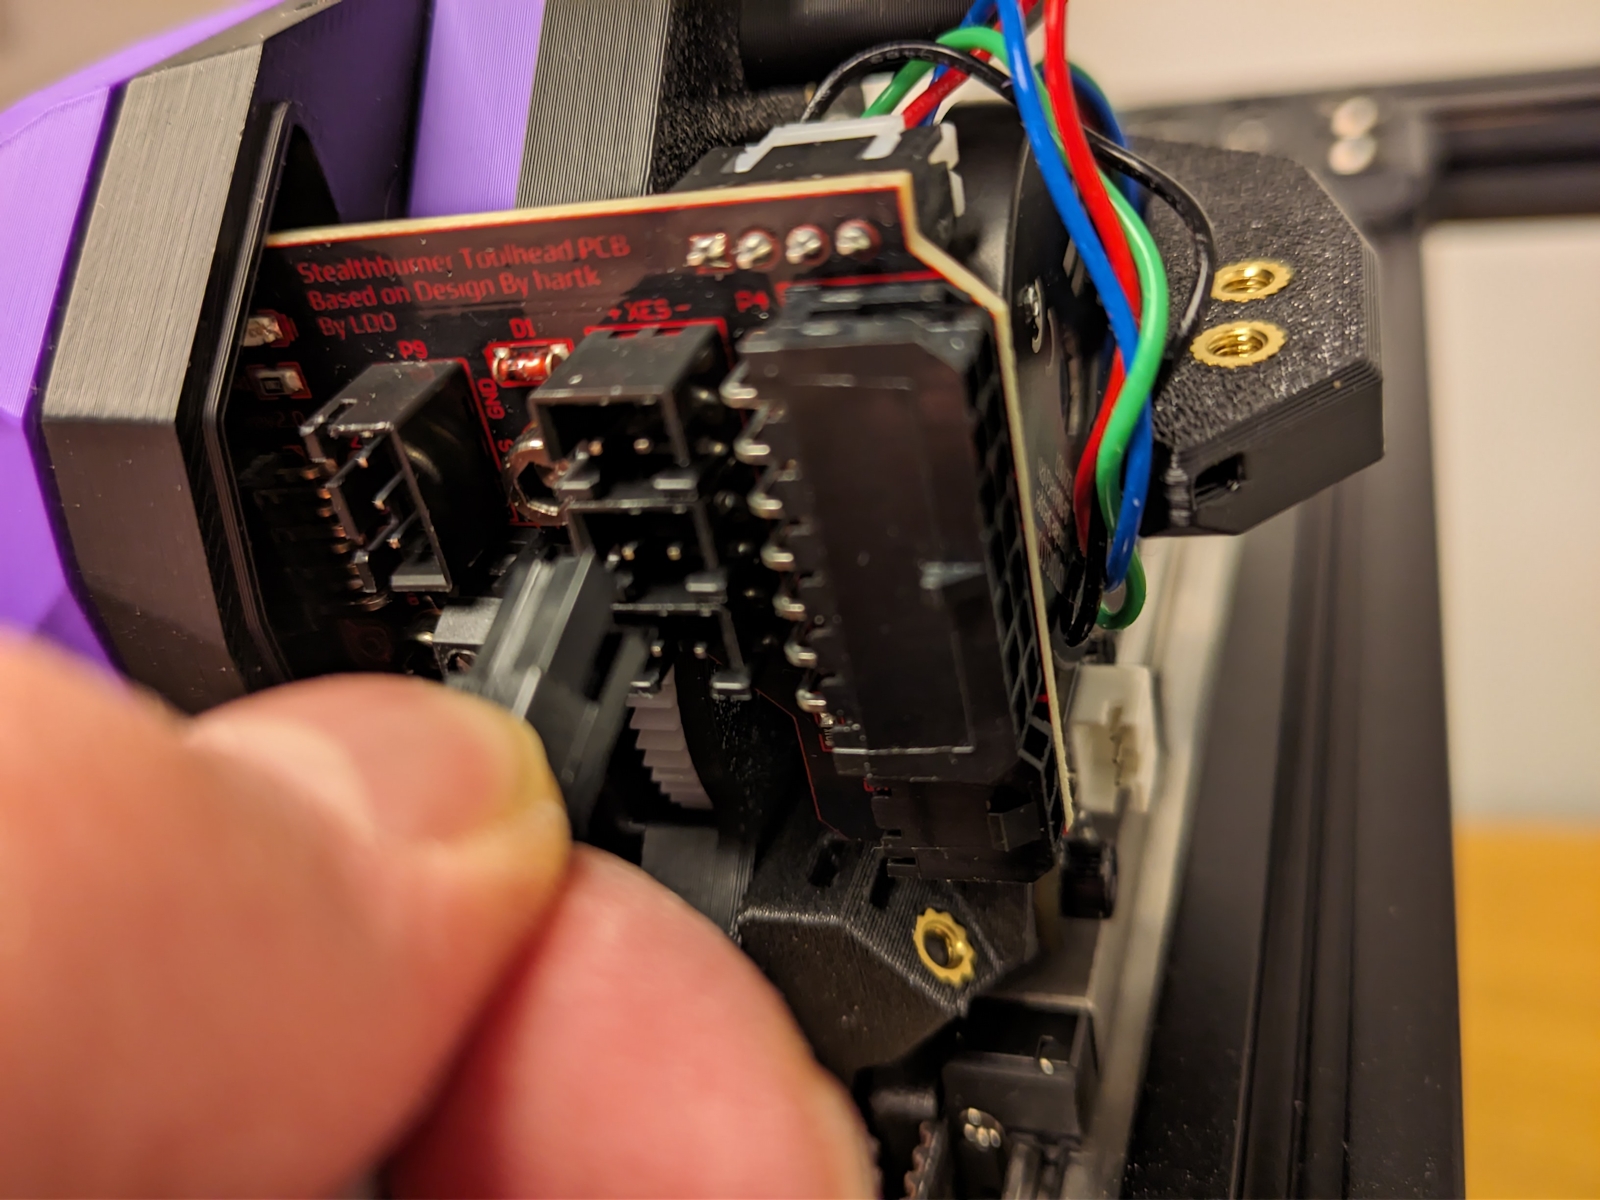
Tap also didn’t have a cable I could just use, so now I had to mess with the wires. Tough luck, I didn’t have any 2-pin or 3-pin connectors (or extra cable), so I left this until later.
That’s a future me problem. Screw that guy.
Missing some minor parts
At this point I discovered I’m missing a few things:
-
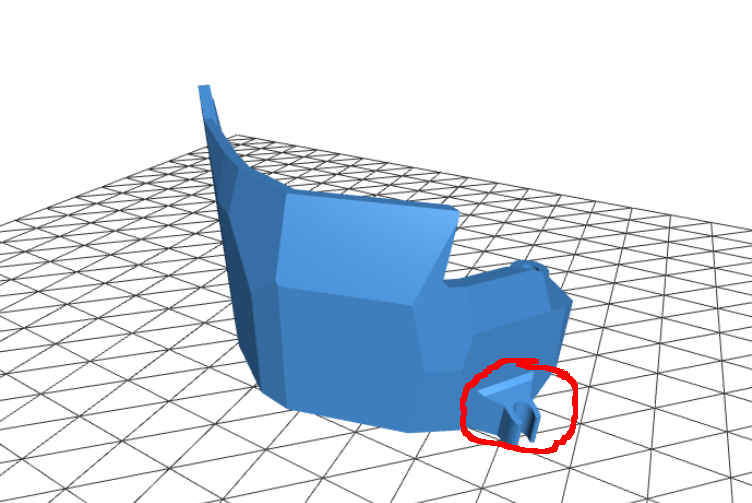
Printed part for the input shaper.
Maybe I just haven’t found it, but either way it’s not a big deal. Input shaper seems to be a temporary thing that you should remove after some calibration, so I guess I can just tape it temporarily.
-
The LDO specific cable cover I mentioned before.
-
2 Locking Washer, M5
Maybe I can find two of these things in the hardware store somewhere? Ordering these online for only two pieces seems like a hassle.
I’ve contacted 3Djake about the washers, maybe they’ll find some replacement parts for me. But even if they don’t it’s no big deal.
I thought I was missing the neopixels and the inductive probe, but they were hiding in a bag in the cable box.
How does it feel?
Even though I’ve had a fair amount of trouble sorting through documentation and other issues, the progress has felt good. It’s really fascinating to assemble things like the belt system and the toolhead and see how they come together.